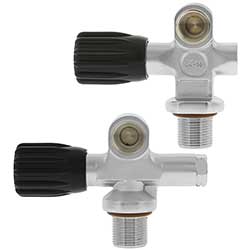
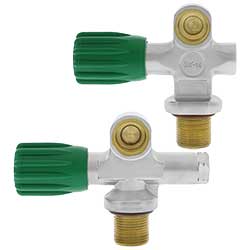
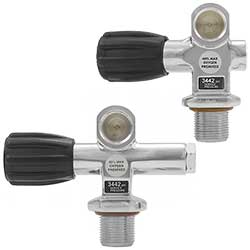
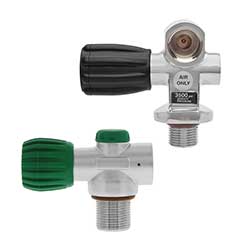
Valves
 WARNING
Installing Valves in SCUBA Cylinders (Torque Specifications)
Before installing the valve, any existing lubricant should be completely removed from both the cylinder threads and the valve threads using a clean lint-free cloth. Always place a new neck o-ring at the base of the valve inlet threads (an oxygen compatible neck o-ring is always included with our valves). Dive Gear Express currently does not recommend using any form of lubricant, even oxygen compatible lubricant, when installing our Nitrox Ready SCUBA valves in oxygen clean cylinders. For more information, please read Lubrication and SCUBA Valves.
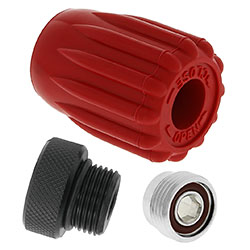
For the DGX and Thermo brand scuba valves we offer, you may use the following torque values: The dip tube can be installed hand tight and snugged up with a hex key, about 40 inch-pounds, but do not over tighten or it will break off. The valve should be installed in the SCUBA cylinder with the least amount of force that will form a seal and retain the valve in place. Modern SCUBA valves that capture an o-ring in the cylinder neck can be installed by hand and snugged up with an open-end wrench across a flat at the base of the valve, about 50 foot-pounds. Take care to not over tighten the valve because it's the o-ring that makes the seal. Should the modular port plug or bonnet nut need to be replaced, it also can be hand tight and snugged up with an open-end wrench, about 30 foot-pounds.
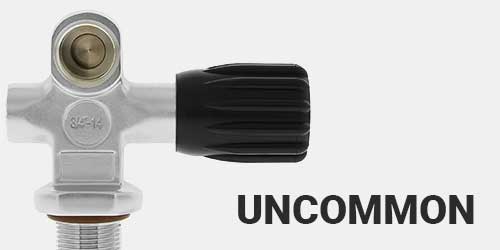
To install the valve in the cylinder, screw the dip tube into the small inlet hole at the bottom of the valve and then screw the valve into the cylinder neck. Mate the threads using the click technique to avoid cross threading. The valve inlet threads should not bind and force is NOT required to fully screw the valve in to the cylinder neck. Snug the valve in to the neck, but do not use the wrench across the face of the valve and do not bang on the handwheel. An inspection should follow tightening the valve; be sure there is metal to metal contact all the around the base of the valve and the neck of the cylinder.
One important caution regarding thread compatibility; outside the United States, particularly in Europe, a widely used SCUBA cylinder neck thread form is M25. The 3/4 NPSM (ISO 228) imperial threads and M25 (BS 3643) metric threads are very similar but not identical; with the use of excessive force it's possible to mate diving cylinders and valves with these two different forms. However, the mismatched threads eventually separate with dangerously explosive force, often causing injury.
Note that port plugs used on the modular valve with the typical side handwheel are notched on the corners of the wrench flats. The notches indicate the screw threads are reversed, and must be rotated clockwise to remove and rotated counter-clockwise to install. This is the opposite of typical screw threads and attempting to remove the notched plug using counter-clockwise force will permanently damage the valve.
New scuba valves always include a properly installed over pressure relief device (PRD aka "burst disk") safety assembly. If the safety assembly is ever removed from the valve, the disk and gasket must be discarded because reusing a disk will also cause it to rupture prematurely. Should a safety assembly ever need to be replaced, install it using a socket torque wrench at 100 to 120 inch-pounds. Note that an inch-pound calibrated torque wrench must be used in order to assure proper function of the pressure relief device; too little torque will result in a leak or too much will result in premature rupture.
Product Spotlight
13 Oxygen & Nitrox FAQ
Yes and no; this simple question has a complex answer because there is no widely recognized scuba diving standard for what constitutes suitability for oxygen service. Hypothetically, the equipment we sell could be used with oxygen if we describe it as Nitrox Ready, otherwise you should assume air only service. However, from the point of view of stringent U.S. aerospace guidelines and Compressed Gas Association handling standards for oxygen, nothing in general use in recreational diving is suitable for oxygen service. Using oxygen for diving requires you to make an informed decision to accept for yourself the risks of handing the oxygen. To help form your opinion about the answer read our article About Oxygen Disclaimers.
According to our suppliers, their Nitrox Ready products are oxygen compatible and oxygen clean from the factory, prior to initial use, for compressed gases greater than 23.5% oxygen. (Air is defined as containing from 19% to 23.5% oxygen.) However, most suppliers in the dive industry specify their Nitrox Ready products for use with gas mixtures containing a maximum of 40% oxygen as the upper limit. Although controversial, some dive industry professionals are of the opinion that Nitrox Ready products do not have to be dedicated to oxygen service and may be used interchangeably with CGA Grade "E" air as long as the Nitrox Ready product never contacts gas mixtures in excess of 40% oxygen.
To better understand the issues associated with handling oxygen rich compressed gas, please read Understanding Nitrox Ready.
Since Air is defined by the CGA as containing 19% to 23.5% oxygen, describing nitrogen-oxygen gas mixtures up to 23.5% as Nitrox is just an obscure way of describing ordinary Air. Gas mixtures greater than 23.5% oxygen are what most people assume to be Nitrox, and of course there is also pure Oxygen. To avoid conflict with various dive supplier labeling and any misunderstanding about exactly what constitutes Nitrox, Dive Gear Express sometimes uses the phrase "suitable for service with compressed gases containing greater than 23.5% oxygen" to describe products that are both oxygen compatible and oxygen clean prior to initial use, especially in reference to cylinders and valves.
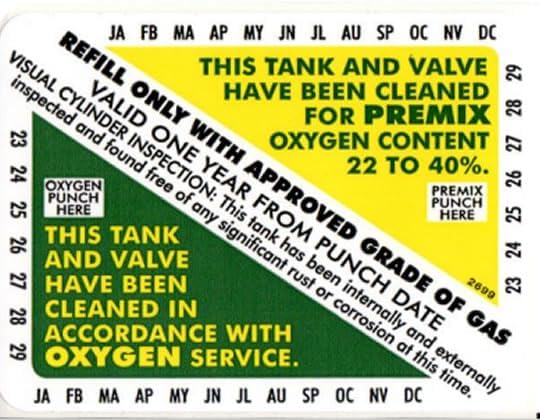
There are several versions of a dive tank VIP decal for sport Nitrox & Oxygen service that is widely available to anyone who wishes to purchase them online from Amazon and eBay. They typically have a punch out described as "cleaned for PREMIX oxygen content 22% to 40%". We will be blunt and clearly state these decals are meaningless; they have no provenance and reference no standards as well as being dangerously inaccurate. Local dive shops following best practice will not normally honor this type of VIP decal.
In rare cases, a shop will insist on some form of after-market "cleaning" before agreeing to fill a tank not sold by them. They have that right, but we want you to know that no such service can make a new empty cylinder and valve marked Nitrox Ready from Dive Gear Express any more oxygen clean.
Our suppliers tell us their equipment described as Nitrox Ready is already oxygen clean from the factory. The Compressed Gas Association standards state that equipment handling any Nitrox mixture in excess of 23.5% oxygen shall be cleaned to their standard as if the gas is pure oxygen, there is no lesser standard. That requirement is why Nitrox Ready equipment has already been oxygen cleaned by the manufacturer. SCUBA equipment is labeled 'NITROX READY' or '40% MAX OXYGEN' instead of 'Oxygen Service' because the manufacturers are managing the risks, both to your safety and their liability, associated with oxygen-related fires and explosions by specifying their SCUBA products for use only with breathing gas mixtures no more than 40% oxygen.
Nitrox Ready and Oxygen Service equipment from our suppliers is not just 'kinda sorta clean' or 'premix clean', it is oxygen clean. The practice by shops and individuals of aftermarket cleaning for new dive equipment that is already oxygen clean from the factory is pointless at best and dangerous if done improperly. Prior to initial use, no amount of aftermarket cleaning can make a Nitrox Ready product more oxygen clean nor can cleaning it ever override the manufacturer specified limits. The manufacturer can't stop you from using their equipment with breathing gases and pressures that exceed their specifications, but doing that requires you to make an informed decision to accept for yourself the risks of handing the oxygen.
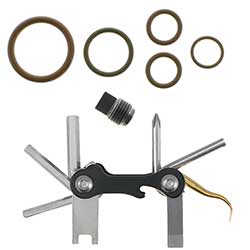
We use the generic terms fluorocarbon elastomer or FKM to describe our O-rings, not the brand name Viton. Fluorocarbon elastomer (aka fluoroelastomer, aka FKM, aka FPM) A-Type material was originally developed by DuPont under the name Viton, FKM is a high performance elastomer with excellent resistance to oxygen. Many people refer to any and all oxygen compatible O-rings as "viton" in the same manner that the Kimberly-Clark brand name Keenex has become synonymous with tissues. However, Viton™ is now The Chemours Company trademark brand name for their fluoroelastomers and use of the brand name requires joining their licensing program. Chemours is not the only company that manufactures FKM products and there are different types intended for various different applications. Counterfeit and mislabeled FKM A-Type material O-rings are so widespread that Dive Gear Express makes up our own kits using O-rings supplied through trustworthy channels.
There is no reliable visual inspection method to determine O-ring material composition, only specialized materials testing equipment can make that determination. Acrylonitrile butadiene rubber elastomers (aka NBR, aka Nitrile, aka Buna-N) are considered to have good resistance to oxygen with a 15 year shelf life. Ethylene Propylene Diene Monomer (aka EPDM) and Fluorocarbon elastomers (aka FKM, aka FPM, aka Viton™) are considered to have excellent resistance to oxygen, with an essentially unlimited shelf life. To ensure specific composition, O-ring material must be specified at time of purchase and then segregated from other O-rings.
There are no O-ring color coding standards and thus color or appearance is not an indication of the material or quality. O-rings are available in nearly any color, although most commonly seen in black regardless of material. Even though most O-rings are black, the loose O-rings sold by Dive Gear Express are oxygen compatible and usually brown, green or purple; simply to make them easily distinguishable from more common NBR O-rings which are usually black. However, oxygen compatible O-rings inside equipment (valves, regulators, hoses, service kits, etc.) are almost always black. O-ring materials also can not be distinguished from each other by their surface appearance, more a function of the manufacturer than the material.
Just to be clear, the COLOR and SURFACE APPEARANCE of the O-ring is MEANINGLESS regarding their compatibility with oxygen.
Yes. Many divers are surprised to learn the SCUBA industry convention of using elastomer seals (aka o-rings) made from fluorocarbon (FKM or FPM, aka Viton™ o-rings) or ethylene-propylene-diene-monomer (EPDM) with Nitrox is not a matter of oxygen fire safety. The introduction of Nitrox in recreational diving included a recommendation to use FKM for seals in gas blending equipment whose wetted surfaces contact pure Oxygen. This was frequently confused with the very important safety requirement for oxygen cleanliness (i.e. the absence of readily combustible materials); creating a mistaken but widely held belief that o-ring material is also somehow related to safety of Nitrox for diving equipment such as SCUBA regulators and cylinder valves.
FKM and EPDM are no more 'safe' in Nitrox diving applications than ordinary synthetic nitrile rubber (NBR aka Buna-N). While FKM and EPDM have a slightly higher temperature of ignition than NBR, nearly any material can still serve as fuel in the kindling chain to an oxygen fire that will reach {~ 5000°F | 2700°C}. The reason for preferring FKM and EPDM in high oxygen content applications is because the service life is typically longer than NBR, i.e. FKM and EPDM are more resistant to oxidation than nitrile rubber although FKM also exhibits a tendency to swell slightly in high-pressure oxygen. While FKM and EPDM o-rings outperform NBR o-rings, in practice there is no safety reason to prefer them in Nitrox SCUBA life-support applications such as regulators and valves given the periodic service requirements of such equipment.
Regardless, Dive Gear Express specifies oxygen compatible and oxygen clean products whenever possible, and we only use O2 compatible O-rings and lubricants in equipment service. Any products we identify as Nitrox Ready or Oxygen Service will meet industry expectations for both oxygen compatibility and oxygen cleanliness prior to initial use.
The short answer is NO. The longer answer is it depends on the exact product formulation and gas pressure but as a practical matter the answer is still no. Silicone "grease" is a generic term for a variety of lubricant formulations that are based on some form of pure silicone oil, most commonly polydimethylsiloxane (PDMS). While pure PDMS itself is a chemically inert inorganic substance that is not combustible; in order to make the little tub or spray can of generic 'scuba lube', the PDMS is mixed with thickeners and/or organic solvents that typically are readily combustible. Lubricant contamination in high pressure compressed gas equipment is a frequent cause of oxygen fires. In general, lubrication in oxygen service applications should be avoided whenever possible. Oxygen service applications in SCUBA that require lubrication must use specialized (and relatively expensive) lubricants, typically based on polytetrafluoroethylene (PTFE) or polychlorotrifluoroethylene (PCTFE) compounds.
It is true that in low pressure Nitrox applications such as regulator second stages and rebreather loops, the type of lubricant is pretty much irrelevant to oxygen fire safety. Occasionally, the desire to minimize use of expensive oxygen compatible lubricants can lead to the erroneous assumption that inexpensive silicone lubricants might used in ambient or low pressure applications that are in close proximity to high pressure applications. However, the high tack and adhesion property of silicone lubes also makes them very migratory and difficult to completely remove. In practice, we find silicone lubrication on the low pressure side of equipment will eventually be transferred to the high pressure side such as a first stage connector or valve outlet. Never use silicone lubricants with electrical contacts, even though this is an often suggested practice. Silicone products will react with plastics and other contaminates to form insulating films and silicone carbide compounds which can cause intermittent connections in low-current applications such as rebreather oxygen sensors. When multiple lubricants are available, there is also the very real increased risk of inadvertently applying the wrong lubricant. In practice, if lubrication is required it is best to only use oxygen compatible lubricant consistently throughout all equipment in service with Nitrox regardless of pressure.
Dive Gear Express avoids silicone lubricants in our facility, using only oxygen compatible lubricants for all SCUBA applications that require lubrication. Any products we identify as Nitrox Ready or Oxygen Service will meet industry expectations for both oxygen compatibility and oxygen cleanliness prior to initial use.
DOT regulations currently limit the oxygen fill pressure of aluminum and composite cylinders to 3,000 psi at 70F. There are no similar DOT fill pressure limits for compressed oxygen gas in steel cylinders, but as a practical matter pure oxygen fills exceeding 3,000 psi are highly unlikely, regardless of cylinder composition or service pressure. In the US, almost all bulk compressed oxygen available to local dive shops is aviation grade in steel DOT-3AA-2400 cylinders with a CGA-540 valve at a service pressure of 2,640 psi. Since most oxygen fills by local dive shops are done using the cascade method, a typical local dive shop pure oxygen fill in a rebreather or decompression cylinder will be between 1,800 psi and 2,400 psi unless the shop has an oxygen booster.
The DOT considers any gas containing more than 23.5% oxygen to be pure oxygen for the purposes of handling. Thus, knowledgeable fill station operators will not fill aluminum cylinders with Nitrox higher than 3,000 psi. This means the 3300 psi "compact" or "neutral buoyancy" aluminum SCUBA cylinders will receive a short fill. Again, there are no such restrictions on Nitrox in steel high pressure SCUBA cylinders with a service pressure of 3442 psi. Although there are some older steel SCUBA cylinders with a service pressure of 3500 psi, recent DOT regulations limit the transport of such cylinders to a maximum fill pressure of 3442 psi as well.
We offer two different gas boosters suitable for applications with recreational diving; both are compressed air driven, air cooled, non-lubricated, reciprocating piston, single action single stage type. The DGX Gears X-30 is a value priced oxygen booster that is suitable for light duty usage. The faster Haskel MSB-9000 is a premium quality oxygen booster manufactured in the USA that is suitable for heavy duty usage in mission critical applications. A benefit of the Haskel booster is additional cooling provided by routing the cold exhausted drive air through a jacket surrounding the gas compression barrel.